Contents
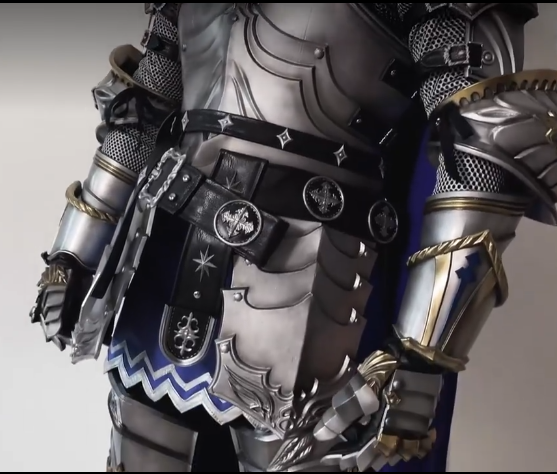
Creating your own cosplay armor can be an incredibly rewarding experience, allowing you to embody your favorite characters with a personalized touch. While it may seem like a daunting task, with the right materials, tools, and techniques, you can create amazing armor that will make your cosplay costume shine. Here’s a step-by-step guide to help you get started.
1. Planning and Research
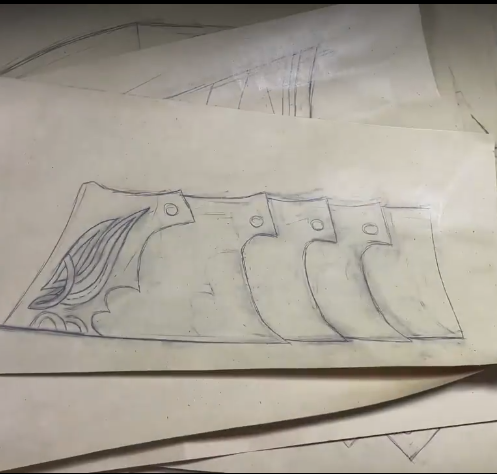
Choose Your Character: Start by selecting the character whose armor you want to replicate. Ensure you have multiple reference images from different angles to understand the details and proportions.
Design and Patterns: Sketch your design and break down the armor into manageable sections. Use online resources or create your own patterns by measuring your body and drawing the shapes on paper.
2. Gathering Materials
Common Materials:
EVA Foam: Lightweight, versatile, and easy to work with. Ideal for most armor pieces.
Worbla: A thermoplastic that becomes moldable when heated. Great for detailed and durable pieces.
Craft Foam: Thinner than EVA foam, suitable for intricate details and layering.
Fabric: For straps, linings, and comfort.
Tools:
Heat Gun: For shaping foam and Worbla.
Craft Knife/Box Cutter: For cutting foam with precision.
Dremel Tool: For sanding and detailing.
Hot Glue Gun: For assembling pieces.
Contact Cement: For strong, permanent bonds.
Acrylic Paints and Brushes: For finishing touches.
3. Creating the Armor
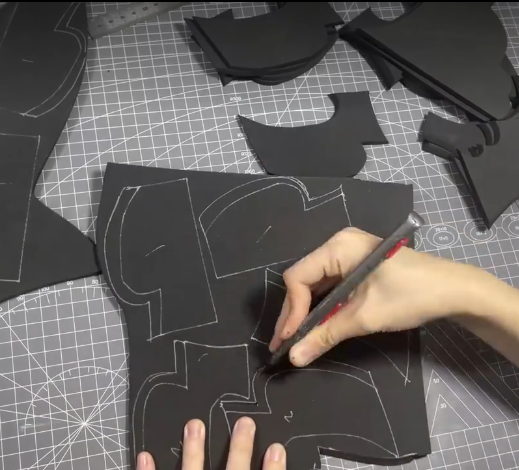
Step 1: Patterning
Transfer your patterns to the EVA foam or Worbla. Use a sharp craft knife to cut out the shapes.
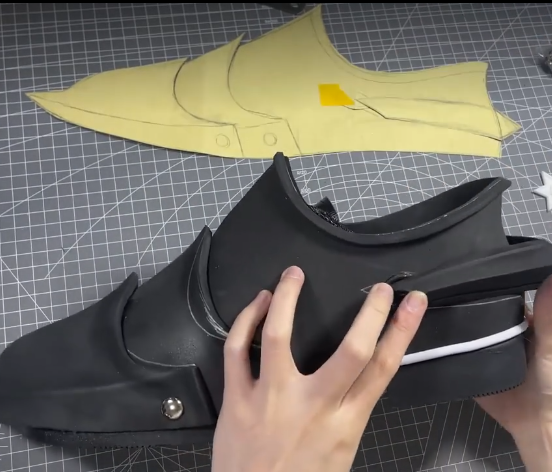
Step 2: Shaping
Use a heat gun to warm the foam or Worbla until it becomes pliable. Shape it over a rounded surface or directly on your body (wearing a protective layer) to achieve the desired contours.
Step 3: Assembling
Glue the pieces together using contact cement or hot glue. Hold them in place until the adhesive sets. For Worbla, overlapping edges and heating them together creates a strong bond.
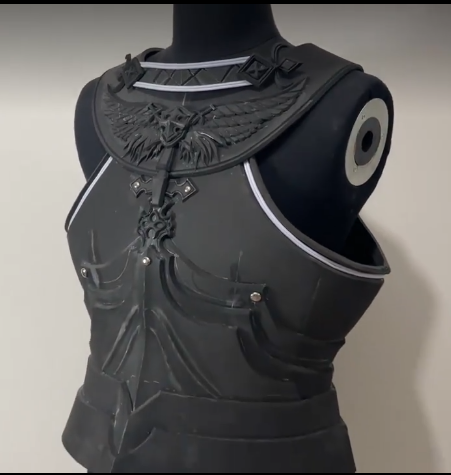
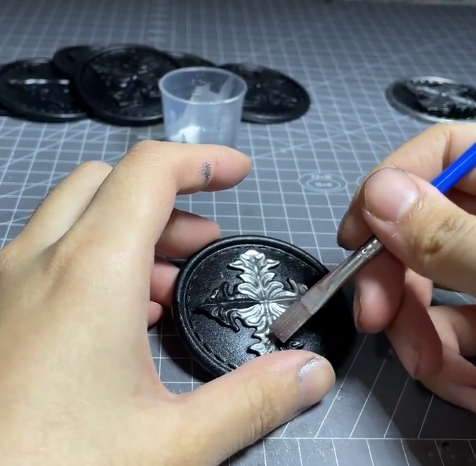
Step 4: Detailing
Add details with thinner craft foam, Worbla, or sculpting tools. Sand any rough edges using a Dremel tool for a smoother finish.
Step 5: Sealing
Seal the foam with a few coats of Mod Podge or Plasti Dip to create a smooth surface for painting and to protect the foam.
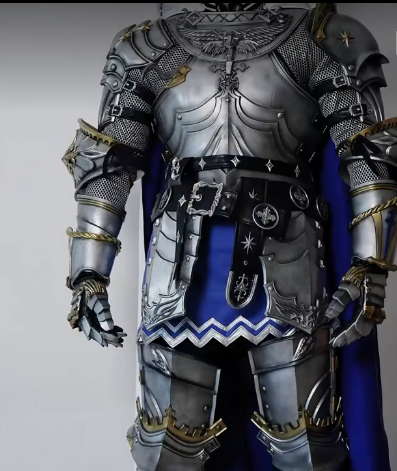
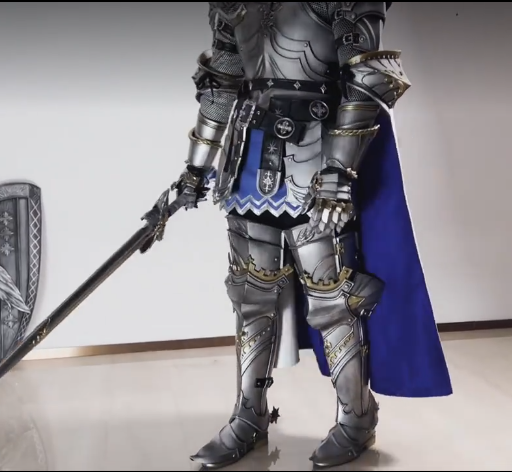
4. Painting and Finishing
Priming:
Apply a primer to ensure the paint adheres well to the surface. White or black primer is commonly used depending on the final color scheme.
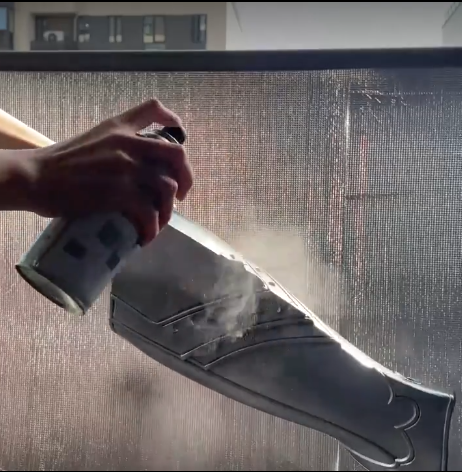
Base Coat:
Apply the base color using acrylic paints. Spray paints can also be used for a more even coat. Multiple thin layers prevent streaking.
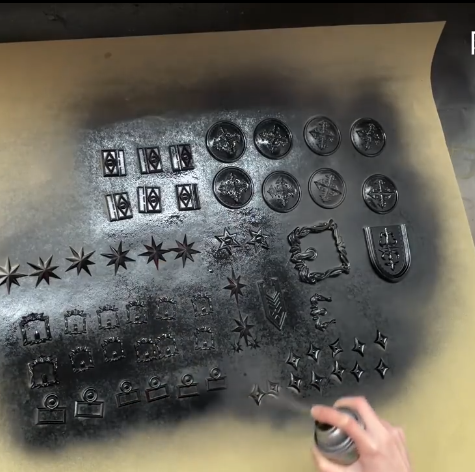
Detailing:
Add weathering, shading, and highlights to give your armor a more realistic and worn look. Use a dry brushing technique to highlight edges and crevices.

Sealing:
Once the paint is dry, seal your work with a clear coat spray to protect the paint job and add a glossy or matte finish as desired.
5. Straps and Fastenings
Attaching Straps:
Use nylon straps, elastic bands, or Velcro to attach the armor pieces together. Ensure they are secure but comfortable.
Padding:
Add foam or fabric padding inside the armor for additional comfort and to prevent the armor from slipping.
6. Final Adjustments and Wear Test
Fitting:
Try on your armor and make any necessary adjustments for comfort and mobility. Ensure all pieces are securely fastened and that you can move freely.
Practice:
Wear your armor for short periods to get used to the weight and feel. This will help you make any final tweaks before the event or photoshoot.
Creating cosplay armor is an art that combines creativity, craftsmanship, and a bit of patience. By following these steps and investing time in research and practice, you can create impressive armor that will make your cosplay stand out. Remember, every mistake is a learning opportunity, and each piece you create will be better than the last. Happy crafting!
Related Reading : How to Style a Wig Cosplay